Option 1
According to https://support.office.com/en-us/article/Share-calendars-with-external-users-FB00DD4E-2D5F-4E8D-8FF4-94B2CF002BDD
Share calendars with external users
Applies To: Office for business Office 365 Admin Office 365 Small Business Admin
It’s often necessary to schedule meetings with people outside your organization. To simplify the process of finding mutually agreeable meeting times, Office 365 enables you to make calendars available to “external users,” those who need to see free/busy time but don’t have user accounts for your Office 365 environment.
Calendar sharing is a global setting, meaning that you, the Office 365 admin, can enable it for all users in the tenant. Once sharing is enabled, users can use Outlook Web App to share their calendars with anyone inside or outside the organization. People inside the organization can view the shared calendar side-by-side with their own. People outside the organization will be sent a URL that they can use to view the calendar. Users decide when to share, how much to share, and when to keep their calendars private.
NOTE: If you want to share calendars with an organization that uses Exchange Server 2013 (an on-premises solution), the Exchange administrator will need to set up an authentication relationship with the cloud. This is known as “federation” and must meet minimum software requirements. See Sharing for more information.
Enable calendar sharing using the Office 365 admin center
- Sign in to Office 365 with your work or school account.
- Select the app launcher icon
 and choose Admin.
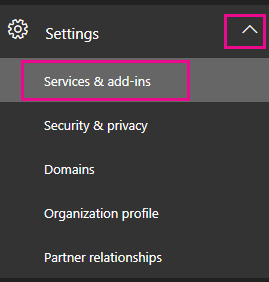
 - Navigate to Settings > Services & add-ins.
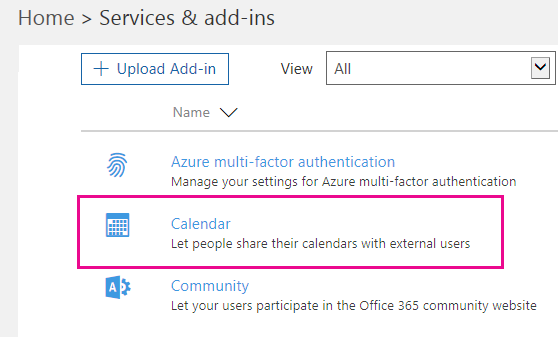
- On the Services & add-ins page, click Calendar.
- On the Calendar page that opens, do one of the following:
- For Let your users share their calendars with external users who have Office 365 of Exchange, move the slider to On to enable calendar sharing.
- For Let your users share their calendars with external users who have Office 365 of Exchange, move the slider to Off to disable calendar sharing.
- If you want to allow anonymous users (users without logon credentials) to access calendars via an email invitation, for Allow anonymous users to access calendars with an email invitation, move the slider to Off.
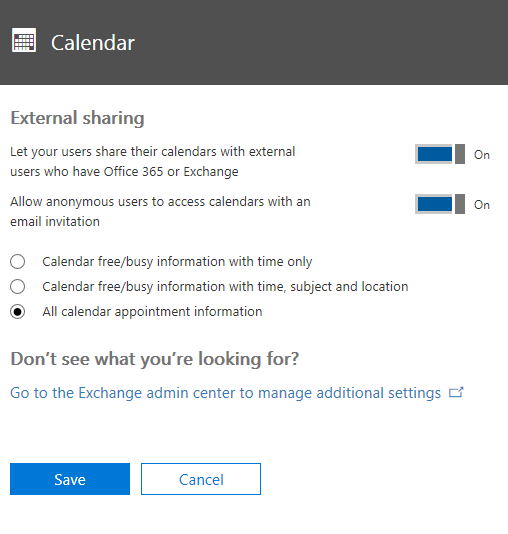 When you select the check box to allow anonymous users, you’ll have to decide what type of calendar information to make available to users. You can allow all information, or limit it. These choices specify the amount of information that your users can show on a case-by-case basis. Select one of the following:
 - Calendar free/busy information with time only
- Calendar free/busy information with time, subject and location
- All calendar appointment information
Option 2
According to https://support.office.com/en-us/article/Overlay-a-SharePoint-calendar-with-a-calendar-from-Exchange-or-SharePoint-4CAEBE59-3994-4A94-9322-B31ABB8A5E9A
Overlay a SharePoint calendar with a calendar from Exchange or SharePoint
If you use a SharePoint calendar on your site, you can overlay your own Exchange calendar onto it to create a combined calendar view. Alternatively, you can overlay another SharePoint calendar as long as both SharePoint calendars are in the same site collection. In all, you can add up to four Exchange or SharePoint calendars.
This enables you to see combined schedules. For example, when you overlay an Exchange calendar to a SharePoint group calendar, you can see your own schedule and the group schedule at the same time. This can be helpful for choosing a time for a team event, or planning a time to present training.
NOTE: To change calendar settings, you must have at least design permission level for the site.
To learn more about group calendars in SharePoint, see Use a Group Calendar.
I want to
Overlay a SharePoint calendar on another SharePoint calendar
Overlay an Exchange calendar on a SharePoint calendar
The following procedure describes how to overlay an Exchange calendar onto a SharePoint calendars for a SharePoint calendar. After you overlay the calendar, you can use this calendar to create a special calendar view.
IMPORTANT: You can only overlay your own Exchange calendar. That is, the Exchange calendar overlay works with the account credentials of the user who is current logged on. SharePoint uses the account information of the current user to retrieve calendar data from the Exchange Web Service.
To overlay an Exchange calendar, follow these steps:
- In a SharePoint calendar, in the ribbon, on the Calendar tab, click Calendar Overlays.
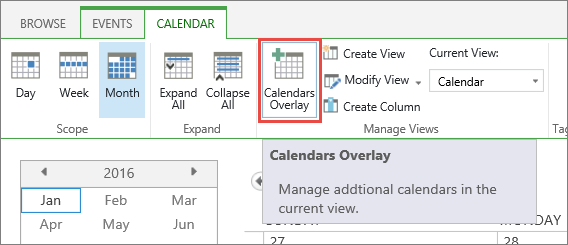
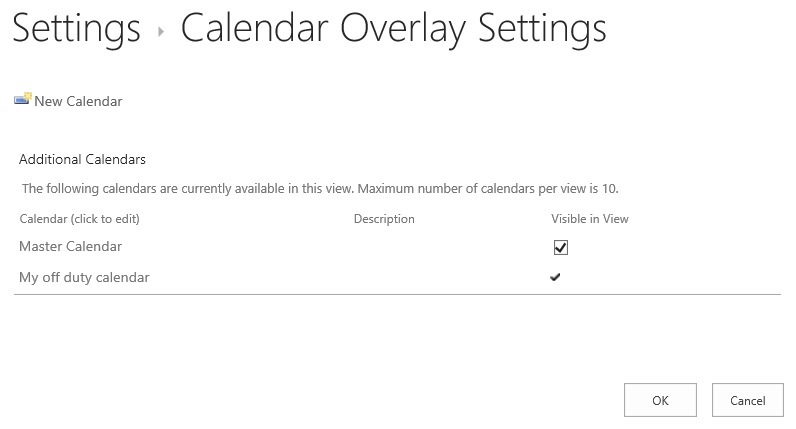
- In the Calendar Overlay Settings page, click New Calendar.
- In the Name and Type section, type the Calendar Name and select Exchange.
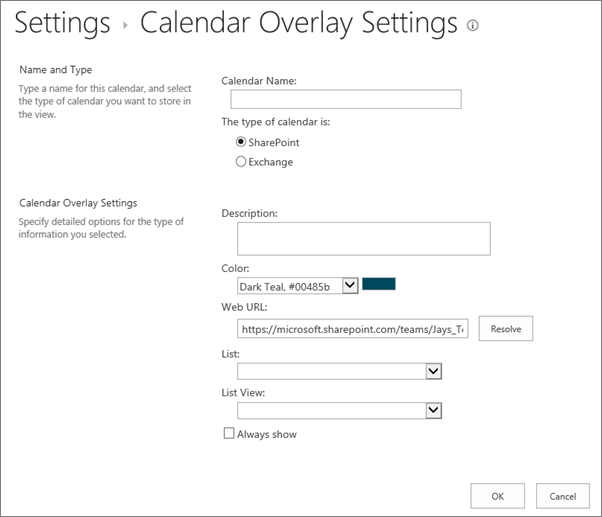
- In the Calendar Overlay Settings section, type a Description for the calendar (optional), and change the default Color theme for the calendar (optional).
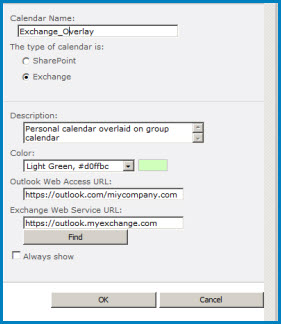
- Click Find to automatically fill in web addresses for Outlook Web Access URL and Exchange Web Service URL. If Find does not work in your environment, type the URLs manually.
- If you want this Exchange calendar to always appear with the SharePoint group calendar, click Always Show. When Always Show is not checked, you will be able to turn overlays on and off from the page. If it is checked, the overlay calendar will always appear on the page's calendar.
- Click OK and then click OK again.
No comments:
Post a Comment