Follow the steps below to host an MobileAppDev Enterprise app on your own website. Important: These steps will have to be repeated with each new “store” update of the app.
Hosting the iOS app
Download the .ipa, .plist, icon and icon512 files belonging to your Enterprise app. Based on the app number, you will be able to download these assets from the following links: - http://apps. MobileAppDev.com/appnumber/appnumber.ipa - http://apps. MobileAppDev.com/ appnumber/appnumber.plist - http://apps. MobileAppDev.com/ appnumber/Icon.png - http://apps. MobileAppDev.com/ appnumber/Icon512.png
Open the .plist and adjust the three url’s for respectively the .ipa, icon.png and icon512.png to links on your own domain.
Host the .ipa file as mimetype octetstream and the.plist as mimetype plain text on a page of your choice.
Make sure that the download button of your app on the download page refers to the .plist file in the following manner: itms-services://?action=downloadmanifest&url=domein/appnummer.plist
Hosting the Android app
Download the .apk file of your Enterprise app. Based on the app number, you will be able to download these assets from the following link: - http://apps. MobileAppDev.com/appnumber/appnumber.apk
Host the .apk as mimetype octetstream on a page of your choice.
Make sure that the download button of your app on the download page refers to the location of the .apk file.
NOTE: If you have already installed the same iOS app before from another domain, you will have to remove the app from your device completely before installing it again from the current domain. This will prevent issues during installation.
Making changes to the app
When you have made changes in your app, you will be able to view these changes directly in the Previewer app. When you are satisfied with these changes, you can publish the changes to your live app by hitting the “Update your app” button on the publish page of your app in MobileAppDev. Please note that a store update might be required when you’ve adjusted information on the publish page of your app, or when you’ve added new functionality to your app.
What if a store update is required?
When publishing an update to your app, the wizard might indicate that a store update is required. Obviously your Enterprise will not have to be re-submitted to the store, but it will have to be built by us with the latest version of our code.
The process will go as follows:
A store update was triggered for your app.
MobileAppDev will build a new version of your app and place it on the appsite: https://apps. MobileAppDev.com/appnumber/download Note: If you have a no-branding app, this appsite will be disabled. You can still navigate to the links in the explanation above regarding the hosting of your iOS and Android app.
You will be notified by us when the new version of your app is available.
Repeat the steps for hosting your iOS and Android app described earlier, to host the latest version of your app on your own domain.
How to publish an Enterprise app with MobileAppDev platform.
Even though it is possible to publish Enterprise apps with MobileAppDev platform, the option to do so does not present itself when publishing your app to the store. In order to make sure that your app is published to the store as an Enterprise app you can contact support@incoreporation.com regarding the publication of your app. Please mention your app’s name and number, found in the App Vitals section on your app’s "App Summary" page.
In order to publish your app as an Enterprise app, the following licenses are required:
Apple Developer Enterprise license
Google Play Developer license
An Apple Developer Enterprise license is required to create the certificates to package and distribute your app. Registering an Apple Developer Enterprise license can be done here.
A Google Play developer license is required in order to create API and push notification keys used by your app. More information regarding the registration of a Google Play developer license can be found here.
Trusting an Enterprise Developer app on iOS devices
If the enterprise app you've built is the first one you've developed and downloaded on your iOS device you will need to "trust" the developer of the app.
To do this:
Go to Settings > General > Profile or Device Management (this depends on the iOS 9 version you have installed on the device)
In this screen you can trust your enterprise account.
AppMachine apps have a powerful analytics dashboard. This dashboard displays detailed information about how your app is being used. If you'd like to have an even more detailed overview of how people are using your app and navigating your website you'll need to link the app with a Google Analytics Tracking ID. You can read more about how to do this below.
Your website should already be using Google Analytics for this to work. If your website does not make use of Google Analytics yet then we recommend you start doing so. It's free and can grant you access to a lot of information about how people are using your website. If you do already use Google Analytics please follow these steps:
The following information describes the process for obtaining a Twitter API key for your AppMachine app. This key allows you to make authorized requests for data. Each API key can only be used for one app. If you have several MobileAppDev platform apps that you want to publish, you'll have to go through this process for each of those apps that use Twitter.
1. Go to https://apps.twitter.com/ and log in using your twitter account. If you don't have a Twitter account, create one at https://twitter.com/signup
2. Fill in the "Create an application" form, enter the CAPTCHA at the bottom (if applicable), and click on "Create your Twitter application." Use the information under your app's "Publish" tab to complete this form.
3. Click on "Create my access token" to generate your token. You may have to refresh your browser if it doesn't appear after a while.
4. Copy the following keys from your Twitter app
- Consumer key
- Consumer secret
- Access token
- Access token secret
5. Go to http://design.MobileAppDev.com and log into your MobileAppDev platform account. Select the app you want to publish and got to the "Publish" tab. Towards the bottom of the screen you'll see the "Advanced" section. Click on "Twitter" and you'll find the fields to enter your data. Enter your newly acquired Twitter details here.
6. Make sure you save these details once you've entered them.
To use the Facebook tools, like the Facebook registration tool, you need to create a Facebook App. When you make a Facebook App, that app will have an App ID and an App Secret. With the App ID, you can send several requests to Facebook for data. The Facebook App Secret will be used to decode the encrypted messages from Facebook, so that sensitive information remains protected.
How to: Facebook App ID + App Secret
To complete the following steps you will need to have access to a Facebook account. If you don't have a Facebook account, you can create one here: https://www.facebook.com/
Step 1: Go to http://developers.facebook.com and login with your Facebook account. (Go to Step 3 if you already have a Facebook developer account.)
Step 2: If you don't already have a Facebook Developer account, click on the "Apps" button in the top title bar of the web page. Follow the steps in the wizard to register as a Facebook developer.
Step 3: Once you're registered as a Facebook developer, click on the "Apps" button in the top title bar of the web page. Click on the "Create New App" button in the drop down menu to create a new Facebook app.
Step 4: Enter a "Display Name," "Contact Email," and choose a "Category" for your app. When completed, click on "Create App ID"
Step 5: You will be redirected to a "Product Setup" page. In the left vertical menu, click on "Dashboard"
Step 6: Your App ID and App Secret are available in this page. Click on the "Show" button and enter your Facebook account's password to get the App Secret.
Step 7: Once the Facebook app has successfully been created, you still need to set the app live before the necessary key (App ID and App Secret) can be used by your MobileAppDev platform app. You can set the app live in the "App Review" page of the app.
Gather the required information to fill out the transfer request form. You can fill the information out on the form as you progress through the steps below.
On the following page you will find the name of your app in the top of the screen. Right below the app name you will find the package name, typically written as “com.example.app”.
Obtain the transaction ID for the original account’s developer console registration.
From the left side menu, navigate to the “Settings” page.
At the top of the Settings page, you will find the “Developer name”.
Complete the form by providing the email addresses of the original and target Google Play developer accounts.
After filling out all the fields with the data gathered in the above steps, you will be able to submit your transfer request. Transfer requests are typically processed by Google within 48 hours.
Transfer your app from one Apple developer account to another
Requirements:
Original Apple developer account login information.
Target Apple developer account login information.
Target Apple developer account Team ID.
Please note that the Apple developer accounts used to transfer the app have to have the Agent role. You can find out who the (Team) Agent of your Apple developer account is by logging in on the following page: https://developer.apple.com/account/#/membership
On this same page, also obtain the (Team) Agent email address.
Logout of the Apple Developer Portal. Navigate to iTunes Connect (https://itunesconnect.apple.com/), and login with the original Apple developer account. The account from which you want to transfer the app.
Open the “My Apps” section, and select the app you wish to transfer.
On the bottom of the App Information page, you will find a “Transfer App” link. Click this link to start the transfer process.
Enter the Recipient's Team Agent Apple ID. This is the Agent email address you’ve obtained in step 2.
Enter the Recipient's Team ID. This is the Team ID you’ve obtained in step 1.
Agree to the terms and agreements to request the transfer.
Accept and complete the app transfer:
Navigate to iTunes Connect (https://itunesconnect.apple.com/), and login with the target Apple developer account. The account to which you’ve transferred the app.
After logging in, open the Agreements, Tax, and Banking section.
In the Transfer Agreements section, locate the pending app transfer in the Contracts In Process section and click Review.
Enter the new metadata for your app, which exists of the following fields: - Support URL. - Marketing URL (only required if the app previously had a marketing URL entered). - Privacy policy URL (only required if the app previously had a privacy policy URL entered). - App Review contact information. - App Store contact information. You can copy the above information from the iTunes Connect account from which you’ve transferred the app, or from the publish page of your app in AppMachine.
Lastly, agree to the contract terms and complete the app transfer.
After completing all the steps above, the app is now being transferred to the target account. The process can take up to two business days, but usually does not take more than a few hours. When you’ve completed a transfer, please do not forget to update your Apple developer license information in MobileAppDev platform. http://incoreporation.comhttps://ca.incoreporation.comhttp://wwebservices.ca
According to http://www.androidauthority.com/best-android-emulators-for-pc-655308/
15 best Android emulators for PC and Mac of 2017
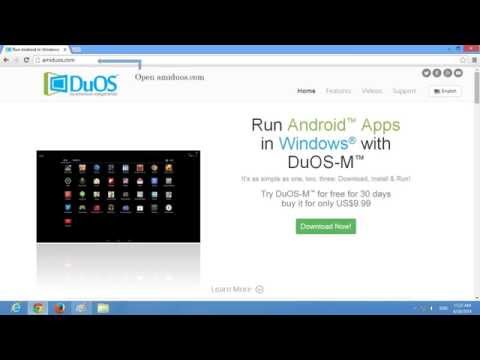
AMIDuOS
Price: Free Trial / $10-$15
DOWNLOAD FROM AMIDUOS!
AMIDuOS is first on our list and this is a relatively newer Android emulator for PC. This one comes in two flavors: Lollipop and Jelly Bean. Aside from the version type, the only other difference between the two is Jelly Bean costs $10 while Lollipop costs $15. The good news is that those are one-time charges. AMIDuOS runs very well for multiple purposes. Most of its features are productivity based. That makes it a good option for those who want to use it for things like office use, homework, etc. There aren't any specific gaming features, but it does run games rather well. Developers could use it for basic testing, but it won't be great for advanced stuff. It's good overall and worth a chance.
Android Studio's emulator
Price: Free
DOWNLOAD ON GOOGLE PLAY
Android Studio is the Google-approved development IDE for Android. It comes with a bunch of tools to help developers make apps and games specifically for Android. As it turns out, there is also a built-in emulator that you can use to test out your app or game. Clearly, this is not a good option for those looking to use it at a consumer level. However, those developing apps do already have a powerful (and free) tool at their disposal to help test their apps. It's a pain in the neck to set up, but it's easier to use once you do.
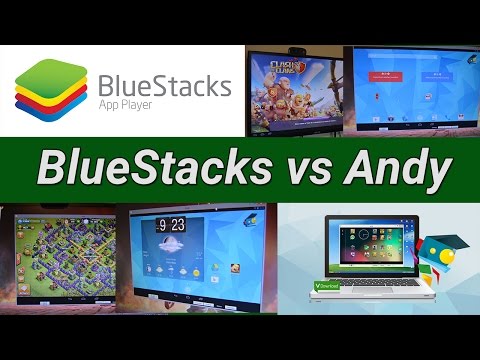
Andy
Price: Free
DOWNLOAD FROM ANDYROID.NET!
MY HONEST REVIEW: ABSOLUTELY THE WORST APP I'VE EVER SEEN, IT'S INFECTED AND CRASHES MAC SO BAD IT SHUTS DOWN. DO NOT BOTHER
Next on our list is an entirely free emulator called Andy. We reviewed this when it first came out and while it did have some issues back then, it still managed to prove itself as a capable replacement for apps like Bluestacks. It runs pretty much the entire gamut of the Android experience including productivity apps, launchers, games, and you can even install root access if needed. That makes it great as a productivity focused emulator although it can play games as well. In any case, it is free and it does work very well. Some have experienced some installation issues. We recommend you beware of those. Andy is also compatible with Mac.
ARChon
Price: Free
DOWNLOAD FROM GITHUB
ARChon isn't a traditional emulator. You install it into Google Chrome. It then gives Chrome the ability to run Android apps. It's not an easy emulator to get running. You'll have to install the thing to Chrome. From there, you have to obtain APKs and load them in. As an added rub, you may need to use a tool to change the APK in order to make it compatible. We have the basic instructions linked up at the button above. This one is compatible with Mac, PC, and Linux. It's also one of the most difficult to set up, but it's also one of the most unique Android emulators.
Bluestacks 3
Price: Free / $2 per month
DOWNLOAD FROM BLUESTACKS!
MY HONEST REVIEW: ALMOST GOOD, APP OPENS AND WORKS UNTIL YOU TRY TO RUN A SIMPLE APPLICATION YOU INSTALLED . DO NOT BOTHER
Bluestacks is the most mainstream of all Android emulators. There are several reasons for that. For starters, it's compatible with Windows and Mac. It was one of the first ones to work reasonably well. The emulator targets mobile gamers. Earlier versions of Bluestacks were kind of bloated. The newest Bluestacks, dubbed Bluestacks 3, came out in 2017. It's not the cleanest experience out there. However, it has the ability to launch multiple instances so you can play multiple games at once (or the same game multiple times). It also includes keymapping and settings for many games installed. That should help make things much easier. It's still a bit bloated compared to something like Andy or Remix. However, those wanting to game should probably start here. Those going for productivity may want something a little leaner.
STOCK YOUR EMULATOR WITH ONLY THE BEST ANDROID APPS AND GAMES!
15 best Android games of 2017
4 weeks ago
15 best Android apps of 2017
4 weeks ago
Droid4X
Price: Free
DOWNLOAD ON DROID4X
Droid4X has had its ups and down.s However, it's one of the classic Android emulators for PC. It features a simple design that should be easy for most people to use. It markets itself towards gamers and boasts support for simpler, casual games. However, like most Android emulators, you can do productivity stuff if you want to. We're not entirely sure if Droid4X is still active, but their download page is. Thus, we recommend you tread with caution as this could be a buggy and unstable product. Droid4x is also Mac compatible. Finding the installer for that is a little difficult, though.
Genymotion
Price: Free with paid options
DOWNLOAD FROM GENYMOTION
This Android emulator is geared toward developers who want to test their apps or games on a variety of devices without actually being required to own those devices. You can configure the emulator for a variety of devices with various versions of Android to help suit your needs. For instance, you can run a Nexus One with Android 4.2 or a Nexus 6 with Android 6.0. You can easily switch between “devices” at will. It’s not great for consumer uses, but Genymotion does offer their services for free for personal use.
KoPlayer
Price: Free
DOWNLOAD FROM KOPLAYER!
KoPlayer is a newer Android emulator for PC. It has also managed to fly under most radars until recently. Its main focus is for gaming. You'll be able to use keymapping to emulate a controller with your keyboard. Players will also be able to record game play and upload it wherever they want. The install process is easy enough and it seems to work alright. Like most emulators, it does have issues that you'll run into randomly. It bills itself as a middle-of-the-road emulator. You'll be able to use it for a variety of things. The only bad side is that it is still buggy. Nevertheless, it's a good, free option.
MEmu
Price: Free
DOWNLOAD FROM MEMU!
MEmu is another of the up and coming Android emulators that seems to do quite well. One of its biggest features is support for both AMD and Intel chipsets. That's rarer than you'd think. Additionally, it supports Android Jelly Bean, Kit Kat, and Lollipop. You can even run multiple instances at once. That makes it one of the few emulators that goes as high as Lollipop. Like many, you can use this for pretty much whatever you want. It'll support most games and most apps. However, we recommend it mostly for productivity. It's free to download and use if you want to.
Nox
Price: Free
DOWNLOAD FROM NOX!
Nox is another Android emulator for PC for gamers. That includes utilities and additions that are specifically catered to helping gamers. You'll be able to do things like game with an actual controller. This includes things like the capacity to assign “swipe right” to, say, an arrow key and simulate actual gesture movements directly on your keyboard or joystick if you have one. It’s a lot of fun and seems to work rather well most of the time. It’s also entirely free. Don't pay attention to the lag in the video below. The emulator doesn't lag like that.
WE'VE GOT A COUPLE MORE APP LISTS IF YOU'RE LOOKING FOR SOME GOOD STUFF!
5 best PlayStation emulators for Android
1 week ago
10 best Android file explorer apps, file browser apps, an...
March 28, 2017
Remix OS Player
Price: Free
DOWNLOAD FROM JIDE!
Remix OS Player by Jide is one of the newer Android emulators for PC. It's also the only one that runs Android Marshmallow instead of Android Lollipop or Kit Kat. The installation process is pretty simple and using it also fairly easy. It caters mostly to gamers. There's a sidebar with customizable options for you. It's relatively new, so they're still working out some bugs. Even so, it still works better than most and it's free in perpetuity. The only main caveat is that it doesn't support AMD CPUs.
Windroy
Price: Free
DOWNLOAD ON GOOGLE PLAY
Windroy is a classic. It's one of the older Android emulators for PC. As such, it's difficult to recommend it to everybody. Think of this one as a last ditch effort if none of the newer, more updated ones work out right. We've heard that it works best on older versions of Windows. It's primarily for productivity. You'll be able to run office apps easily enough. Game support is less reliable. At the very least, the emulator is free to download and installs easily enough. It's worth trying. Especially for older machines.
Xamarin
Price: Free / Varies
DOWNLOAD ON GOOGLE PLAY
Xamarin is an IDE. It's similar to Android Studio. The difference is that it can plug into things like Microsoft Visual Studio. Also like the Android Studio, this comes with a built-in emulator for developers. It's for developers only unless you feel like setting up an entire development environment to use it. Xamarin's emulator is not as powerful as something like Genymotion, but it'll get the job done if you intend on using this. It's free for personal use. Companies and larger teams may have to negotiate a payment plan.
YouWave
Price: Free / $29.99
DOWNLOAD ON GOOGLE PLAY
YouWave is one of the older Android emulators for PC. It's been around for a long time. Its last update was in 2016, though. That makes it fairly current. The free version uses Ice Cream Sandwich. Forking out the $29.99 will get you the Lollipop version. It seems to work pretty well. The installation process was easy enough. It doesn't have any game specific features but it will still play games. That makes it good for light gaming and productivity. This one has had quite a bit more development than most and we recommend it to those trying this whole process out for the first time. This one also has Mac support.
Make Your Own
Price: Free
DOWNLOAD ON GOOGLE PLAY
As it turns out, you can build your own emulator. Here's how it works. You need to download VirtualBox (linked above). You then have to download an image from Android-x86.org. From there, it's just a matter of finding of many guides online and following the steps. This is the most complicated way to get yourself an Android emulator. We don't recommend you try without a tutorial and a little prior knowledge. It won't work well, it'll be buggy, and unless you're a coder, it'll be difficult to fix. Still, it'll be yours.
According to http://techapple.net/2014/12/top-7-free-android-emulators-windows-788-110-pccomputer-run-android-appsgames-windows-78-110/
Top 7 Free Android Emulators for PC – Windows 7/8/8.1/10 | Run Android apps on Computer PC/Windows 7/8.1/10
Gaming on Nox App Player with Keyboard mapping for touch input!
---ADVERTISEMENT---
Nox App Player is our preferred Android emulator to play Android games on PC / Computer (Windows 10 & 7), or to try out new android apps due to its speed.
Nox App Player is fast, plus provides lots of features such as –
One-click root hide / unhide (disable or enable root)
Ability to specify the CPU Processor & Ram size! which is great for gamers & app-testers to check resource usage.
Besides, these Nox even provides Keyboard mapping for touch input. Thus, you can specify the areas where touch is to be simulated, on pressing a keyboard key! (Awesome thing for gamers)
Plus, it even has an inbuilt GPS controller setting, by which you can even play GPS required games such as Pokemon Go directly inside Nox App Player. –> Check out our Nox Player HD tutorial for the same
KO Player is the latest entrant in this list & is a great android emulator especially when it comes to playing Android games on your Computer / PC. KO Player provides a host of great features in its android emulator such as –
Keyboard to Touch Mapping
Crisp Display on Bigger screens due to HD Resolution
Ability directly record your Android emulation screen & save it as a video. Thus, enabling you to share your Gameplay easily.
Besides, you can run multiple accounts of various simultaneously
Since, it is made for gaming KO Player does require a good amount of RAM & graphics memory
Andy OS lets you chat through whatsapp directly on Desktop
AndyRoid is one of its own kind Android Emulator for Windows 7/8/8.1/10 . It supports some unique features which aren’t supported by any other android emulators out there such as –
Using your phone as remote control while playing games!.
ARM support, You can directly install apps in your andy emulator through your host’s desktop browser!.
As Andy is based upon VirtualBox , It doesn’t require any dedicated Graphics card to function smoothly and works well even on Intel HD Graphics.
---ADVERTISEMENT---
Andyroid is very similar and may be classified as an advanced alternative to Genymotion as both of them require VirtualBox to be installed on the system.
Droid4X is perhaps its the most interesting emulators mentioned in this article. Droid4X is designed for real Power! in the hands of user, and its features too point to the same . Droid4X has some salient features such as –
Emulator # 6 – Windroy – The Android emulator with a Windows Kernel!
Windroy on Windows 7
Windroy is perhaps the most unique Emulators present in this article because of the fact – It completely runs using the Windows Kernel!
Windroy doesnt require any external Virtualbox support. Like bluestacks, also its quite light-weight and handy to use!. You just have to take care that the directory path wherein you install Windroy must not contain Spaces.
GenyMotion is another advanced Android Emulator for PC , and may be classified as a worthy alternative to/of Bluestacks. GenyMotion has advanced features like OpenGL, and hardware aceleration support. Its built on the x86 Architecture and hence is faster as compared to BlueStacks.
Bluestacks AppPlayer is probably the Best Android Emulator available because it uses the unique “LayerCake” technology which allows android OS apps to be emulated and run without requiring an external Virtual Desktop App whatsoever.
Also Bluestacks contains inbuilt search manager which allows you to install any apk within itself.
The .apk files can be installed into Bluestacks from guest OS [Mac OS] itself, simply by double-clicking, as well as the apps can be launched directly from the MAC dashboard!
moreover Push Notifications of app installed in Bluestacks are pushed directly to the host OS, hence you can use chat applications like whatsapp and the MAC Os simultaneously and smoothly!
Bluestacks automatically takes up the internet connected to the Guest OS [mac] hence no need of configuring anything!
One of the most striking features of Genymotion is unlike other Android Emulators it allows us to change the type of android device as well as android version we are using!!
This is a great feature and allows us to select a particular device as well as particular Android version which we want to emulate.
It also supports configuring the amount of resources e.g RAM ,harddisk to be allocated to the Android device is possible! Great feature if your are limited on hardware resources.
Directly supports networking through ethernet /Wi-Fi , emulates your connected connection directly so you can use internet directly in your emulated android.
ADB Support and it also supports OpenGL hardware acceleration so you can use your Android device fullscreen and play Games on your MAC!
Also supports drag and drop file transfer to the emulated SD Card 🙂 , supports Gyroscope,Light and accelerometer sensors too.
The Configuration/installation instructions for Xamarin on Mac OS can be found here .
NOTE – You might want to check out this new emulator which runs directly inside Google Chrome Browser – ARChon! Android Emulator., thus it will work on Mac too!
So these were the Best 5 Android Emulators for Mac OS , besides these there are other options available too such as the Android SDK (Official) Emulator ,AndroVM , AndroLite but configuring official Android SDK is a tedious task and other two didn’t interest me much , you can check them out too.