Saturday, February 24, 2018

How to replace drive iMac Model number A1213

iMac Intel 27" EMC 2390 Hard Drive Replacement


How to replace drive iMac Model number A1213


Introduction

Upgrade your hard drive for more storage space!

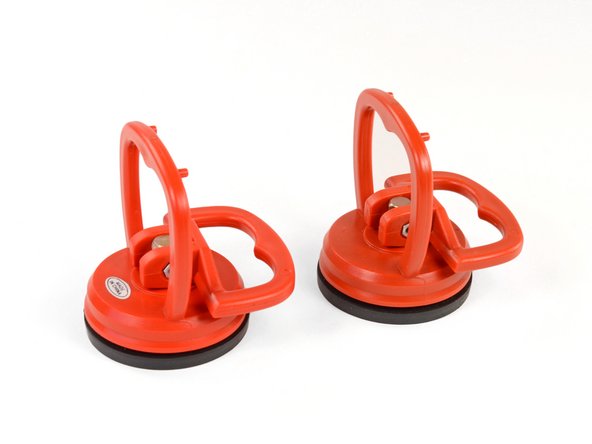
  • Stick a heavy-duty suction cup near each of the two top corners of the glass panel.
  • To attach the suction cups, first position the suction cup with the movable handle parallel to the face of the glass panel (as highlighted in the second picture).
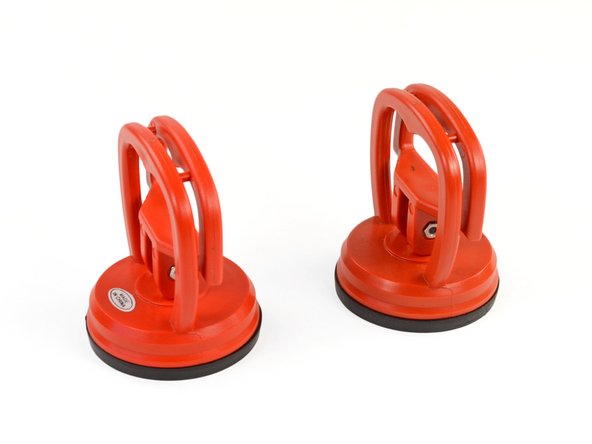
  • While lightly holding the suction cup against the glass, raise the movable handle until it is parallel with the other handle (as highlighted by the third picture).
  • If your suction cups refuse to stick, try cleaning both the glass panel and the suction cup with a damp soft, lint-free cloth. (Dampen with distilled water, and if needed, an equal ratio of distilled water and white vinegar for best results.)
  • Do not use the suction cups to carry the display glass because if one of them fails to stick, you could drop the screen and break it.
  • The original iMac box makes a good place to store the glass panel. Otherwise, a padded horizontal surface, like a towel on a desk will do nicely.
Gently lift the glass panel perpendicular to the face of the LCD enough to clear the steel mounting pins attached along the underside of the top edge of the glass panel.
  • Gently lift the glass panel perpendicular to the face of the LCD enough to clear the steel mounting pins attached along the underside of the top edge of the glass panel.
  • Pull the glass panel away from the lower edge of the iMac and carefully set it aside.
    • Don't use the suction cups to carry the glass panel—if either one loses its grip, the panel could fall and break.
    • After setting the glass panel down safely, be sure to release the suction cups, as the suction force over time, can crack the glass.
  • During reinstallation, be sure to meticulously clean the inside of the glass panel and the face of the LCD as any dust or fingerprints trapped inside will be annoyingly visible when the machine is turned on.
Remove the eight T10 Torx screws securing the LCD to the outer case.
  • Remove the eight T10 Torx screws securing the LCD to the outer case.
Carefully lay the iMac stand-side down on a flat surface.
  • Carefully lay the iMac stand-side down on a flat surface.
  • Due to tight tolerances, you will have to use a thin hooked tool to lift the display out of the outer case. As seen in the third picture, we made one out of a bent paperclip.
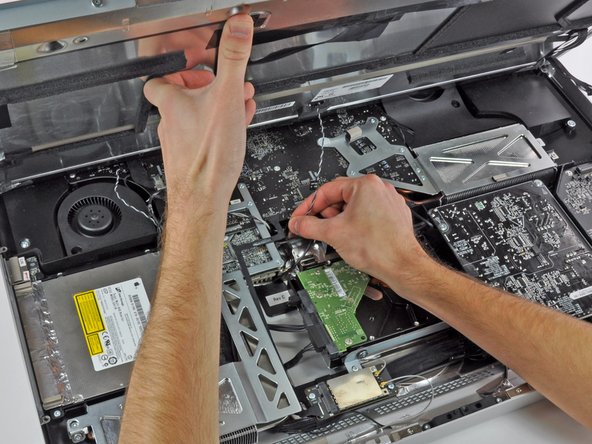
  • Use a thin hooked tool to lift one side of the top edge of the display by its steel outer frame.
  • After lifting the top edge of the display on one side, hold it out of the outer case while you use a hooked tool to lift the other side.
  • Do not lift the top edge of the display out of the outer case too far, as several short ribbon cables still connect the two components.
Using your fingers, carefully pull the vertical sync cable out of its socket on the LED driver board near the top left corner of your iMac.
  • Using your fingers, carefully pull the vertical sync cable out of its socket on the LED driver board near the top left corner of your iMac.
    • Be sure to pull the connector parallel to the LED driver board, straight out of its socket.
New Battery = Faster iPhone
Fix Kits starting at $16.99
Squeeze the two display data cable connector arms together to unlock it from its socket on the logic board.
  • Squeeze the two display data cable connector arms together to unlock it from its socket on the logic board.
  • Pull the display data cable connector away from its socket on the logic board.
Rotate the display out of the outer case enough to disconnect the LED backlight power cable from the LED driver board.
  • Rotate the display out of the outer case enough to disconnect the LED backlight power cable from the LED driver board.
Lift the display for enough clearance to disconnect the LCD thermal sensor cable connector from its socket on the logic board.
  • Lift the display for enough clearance to disconnect the LCD thermal sensor cable connector from its socket on the logic board.
  • If your fan is spinning full speed after completion, check this connection or the hard drive's thermal sensor cable.
Carefully pull the display toward the top edge of your iMac and lift it out of the outer case.
  • Carefully pull the display toward the top edge of your iMac and lift it out of the outer case.
Before disconnecting the thermal sensor cable, take note of its orientation. It is extremely important to reinstall the connector in the current orientation so the fans will not run at full speed. If you have multiple pins on your replacement hard drive, put the connector closest to the SATA connections and closest to the PCB board.
  • Before disconnecting the thermal sensor cable, take note of its orientation. It is extremely important to reinstall the connector in the current orientation so the fans will not run at full speed. If you have multiple pins on your replacement hard drive, put the connector closest to the SATA connections and closest to the PCB board.
  • Disconnect the thermal sensor, SATA power, and SATA data cables by pulling their connectors away from the sockets on the hard drive.
Remove the two T10 Torx screws securing the upper hard drive bracket to the outer case.
  • Remove the two T10 Torx screws securing the upper hard drive bracket to the outer case.


Slightly rotate the hard drive away from the outer case.
  • Slightly rotate the hard drive away from the outer case.
  • Lift the hard drive off its two lower positioning pins and remove it from the outer case.


Remove the two T8 Torx screws securing the upper bracket to the hard drive.
  • Remove the two T8 Torx screws securing the upper bracket to the hard drive.
  • Remove the upper bracket from the hard drive.
Remove the two T8 Torx pins from the other side of the hard drive.
  • Remove the two T8 Torx pins from the other side of the hard drive.


Carefully peel off the piece of EMI foam attached to the front of the hard drive.


  • Carefully peel off the piece of EMI foam attached to the front of the hard drive.
  • Don't forget to transfer this to your new hard drive.


IT Consultant inCOREporation.com

4 comments:

  1. Thank you for putting all these strategies into a very readable place. It shows your ability and great skills. keep sharing such article in future. PCB Board Repair Service

    ReplyDelete
  2. Pakistan no.1 Article in my Installcrack.com site Now just 1 click to download!
    PCUnlocker Crack

    ReplyDelete
  3. You have given essential data for us. about Logic Board Macbook Air 2019 It is excellent and good for everyone. Keep posting always. I am very thankful to you.

    ReplyDelete
  4. I found decent information in your article. I am impressed with how nicely you described this subject, It is a gainful article for us. Thanks for share it.Recover Files From USB Drive London

    ReplyDelete

Featured Posts

Exchange Online Limits - Office 365 Distribution group limits

Exchange Online Limits - Office 365 Distribution group limits What are Exchange Online Limits What are Office 365 Distribution group limi...